Security setting: User management
About Course
As the name suggests, user management part of “Security settings”, helps with viewing, creating and editing users.
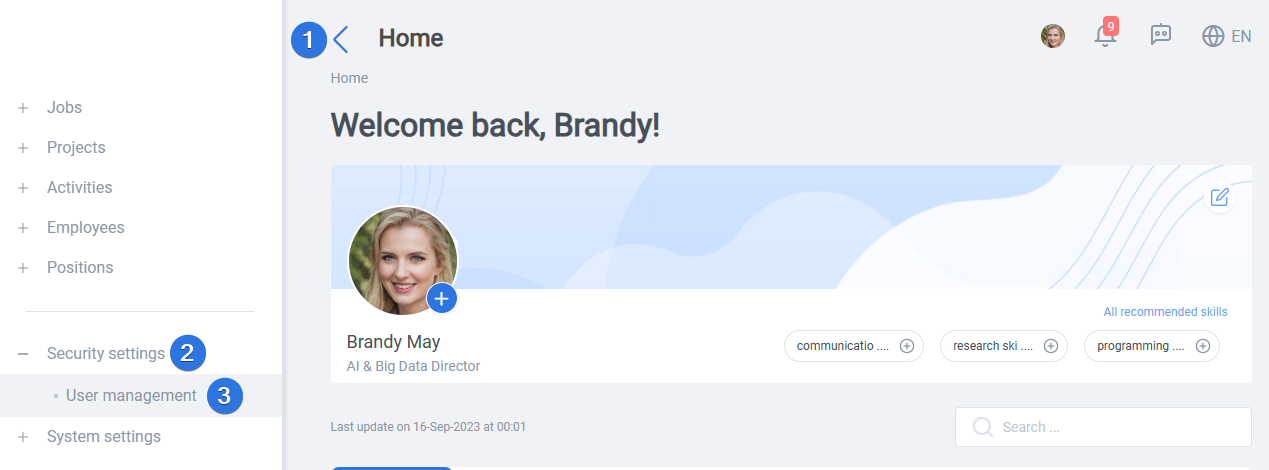
It can be accessed by opening the side bar >> Security settings >> User management, as seen below:
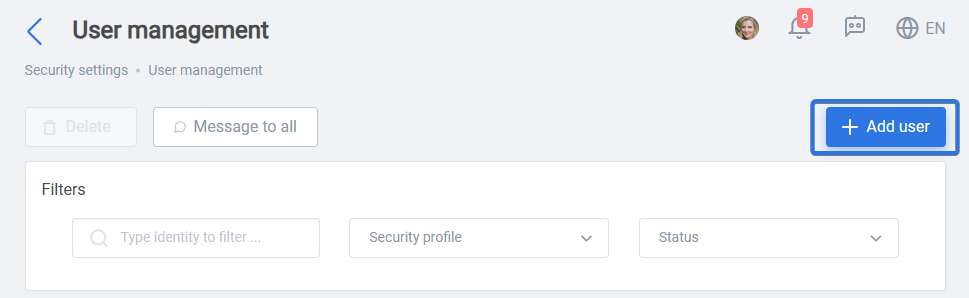
With “Add user” a new account can be created for existing employees:
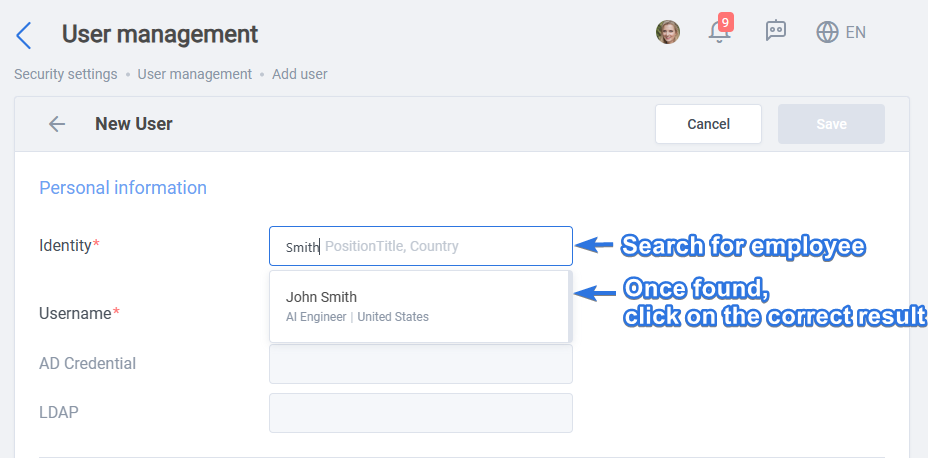
Within the “New user” page opened, use the “Identity” field to input search criteria to find the employee, a new user is going to be created for. Once the target employee appears on the search result list, click on it.
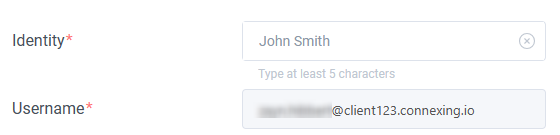
By clicking on the suggestion, email will fulfill automatically, as seen below:
Now you can select user setting and change access of the employee:
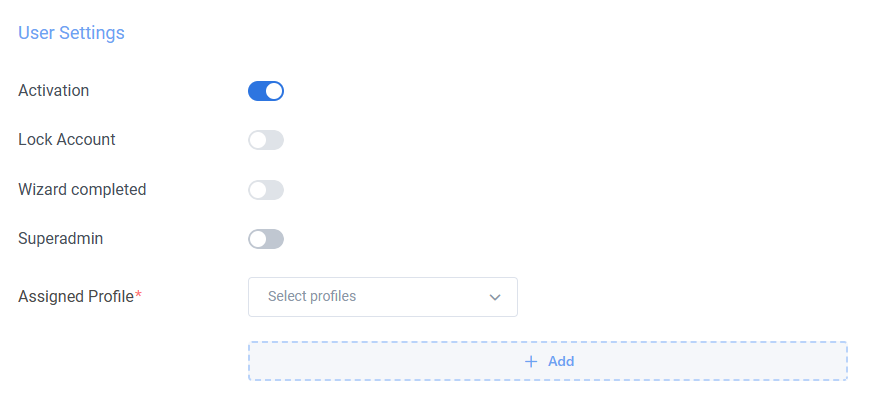
- Activation: This switch will turn activate/deactivate the user completly.
- Lock Account: This switch will lock access for the employee. If employee account is locked due to multiple failed attempts for logging in, it can be unlocked by this switch as well.
- Wizard completed: After first use of the site, you can reset wizard for your employee to make them go through the wizard again.
- Super admin: This switch will enable Superadmin status with access to all site features for the employee.
- Assigned Profile: In this part you will choose the security profile of the employee which controls what employee can access (you cannot give higher access than yours). By choosing the “Add” button, it is possible to assign multiple profiles to a single user.
Default security profiles are:- HR (human resource manager)
- MSS (manager self-service)
- ESS (employee self-service)
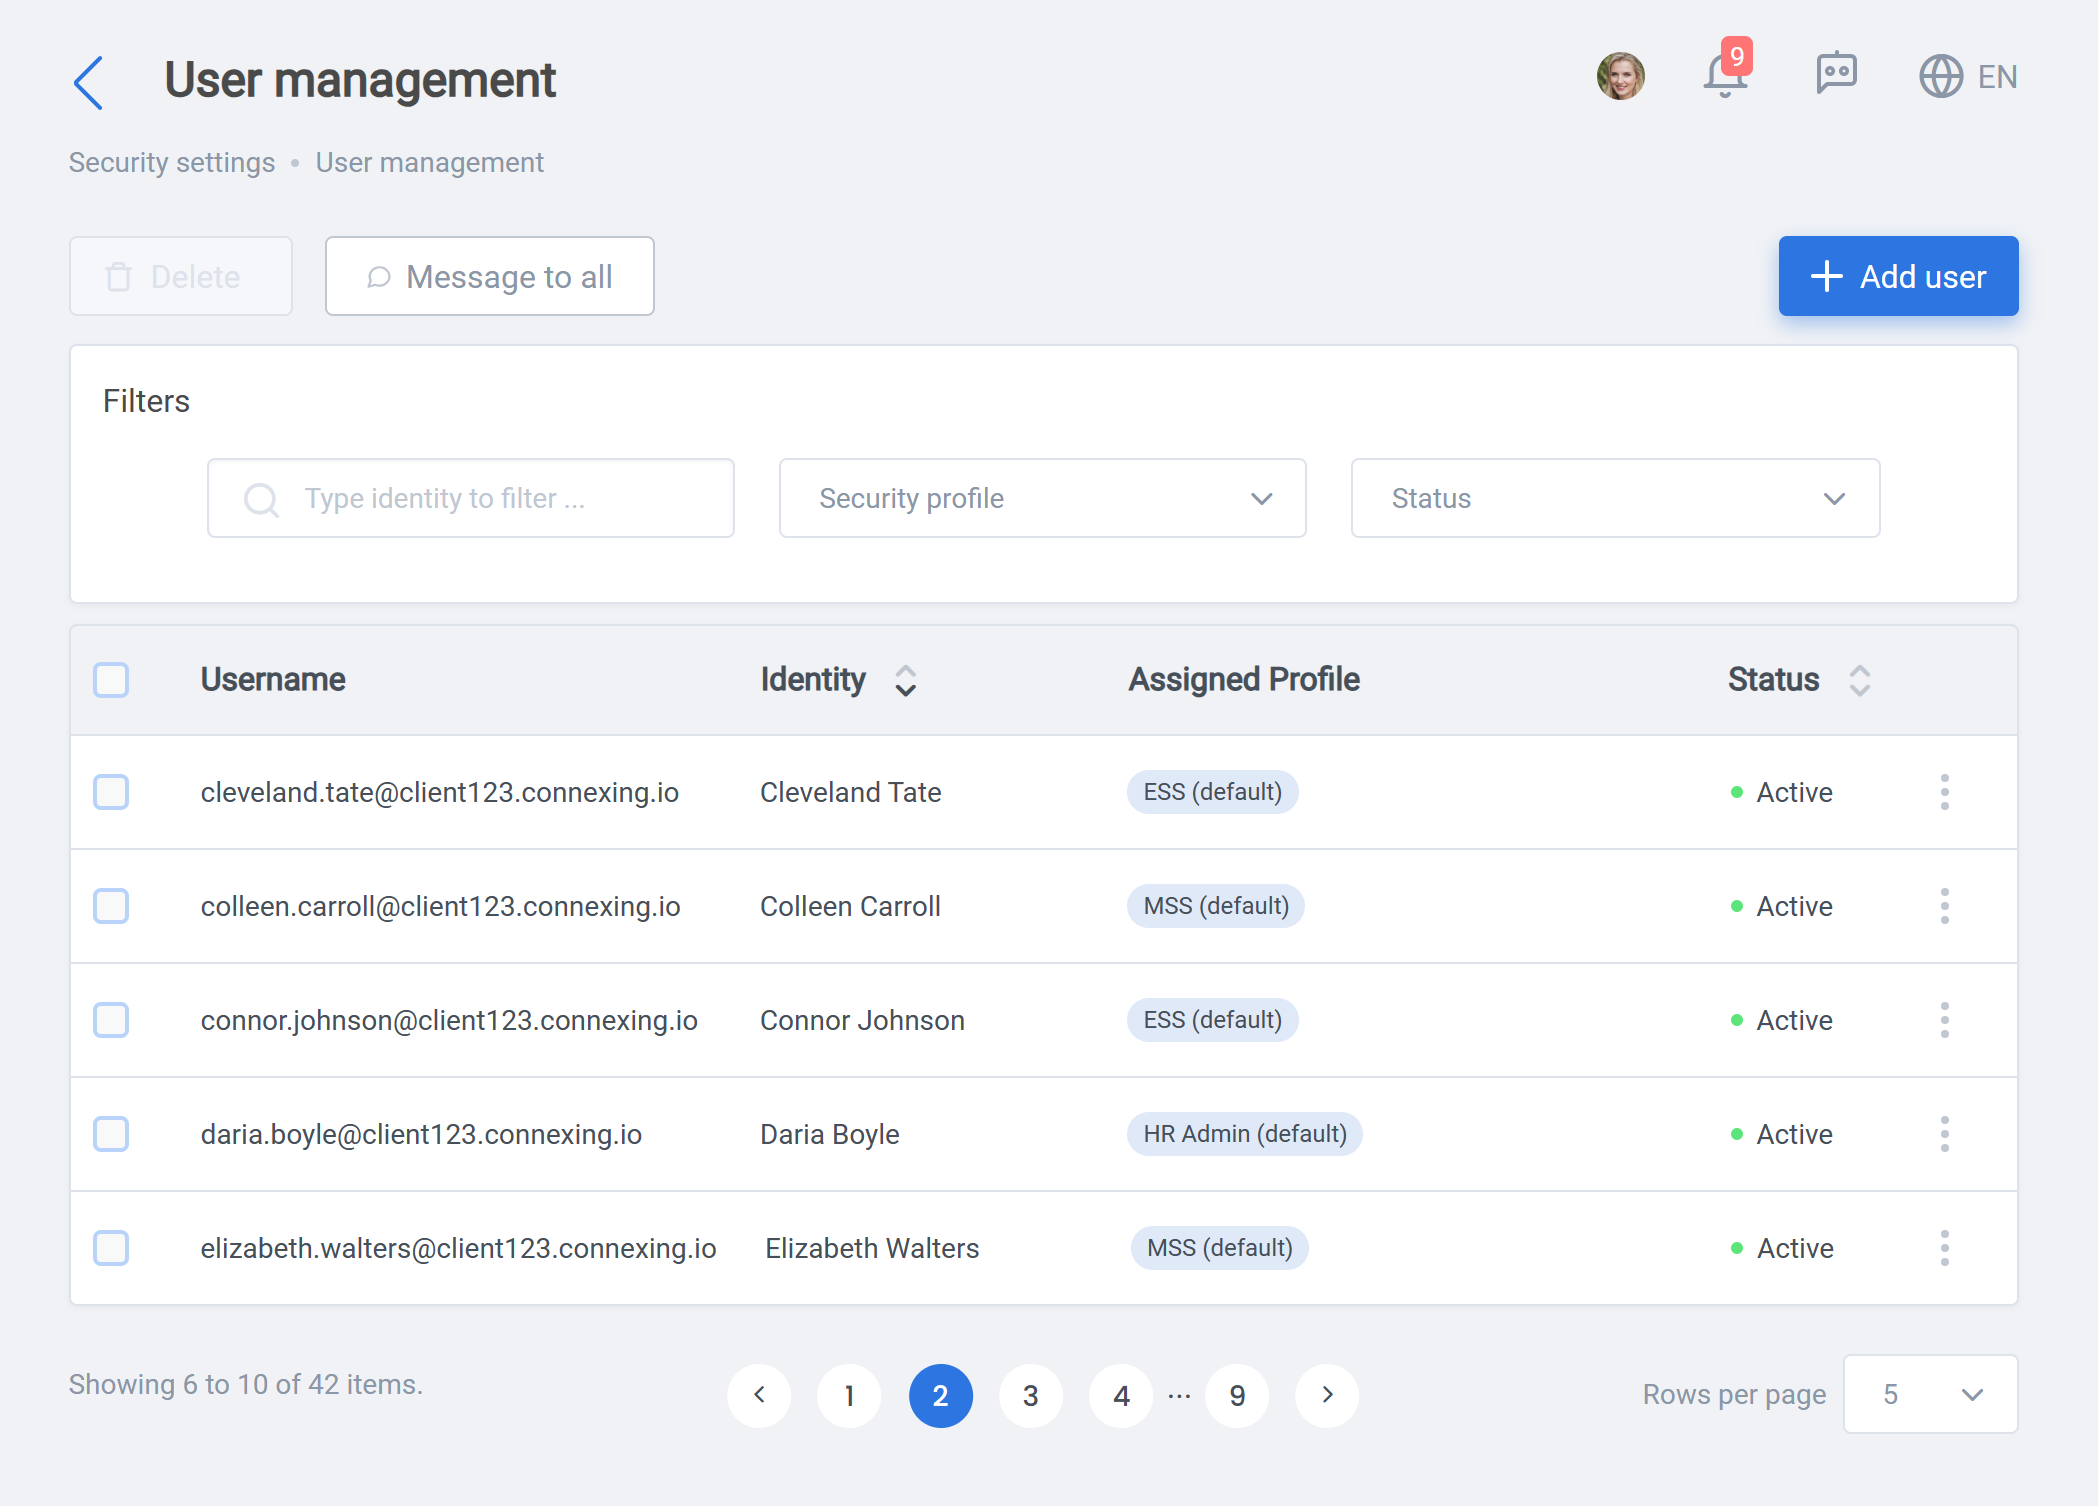
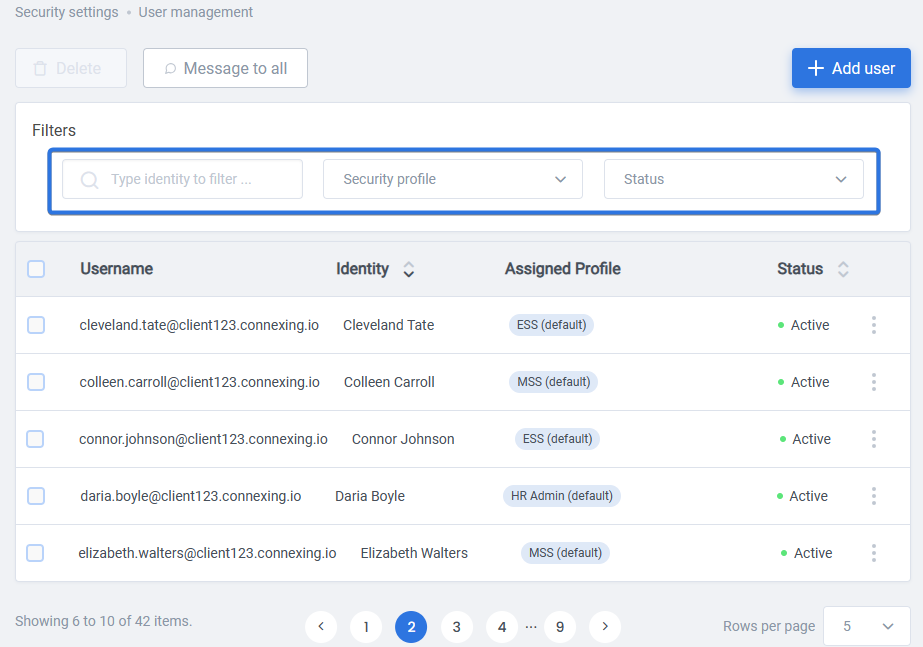
Once the user creation is done, back at the main user management page, currently created users can be viewed and filtered by their identity, security profile and account status:
It is possible to edit, send massage to or delete an account using the three dots next to each user:
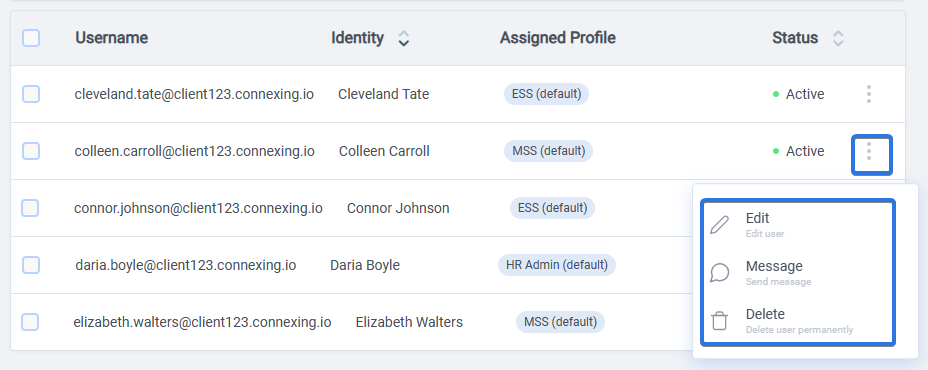
Edit user, brings up the same options as creating a new user, with additional option of sending the reset password email to the employee’s email address.
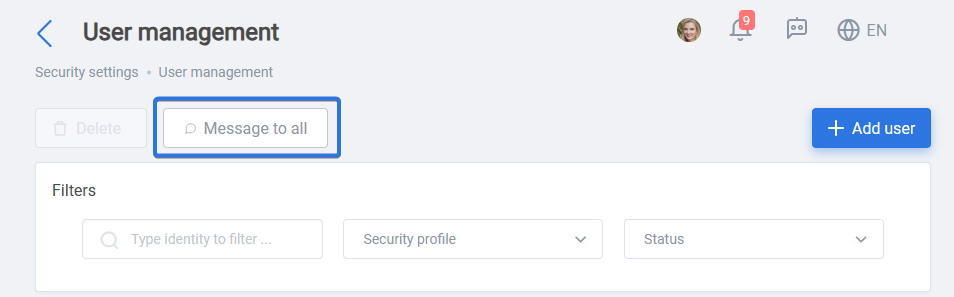
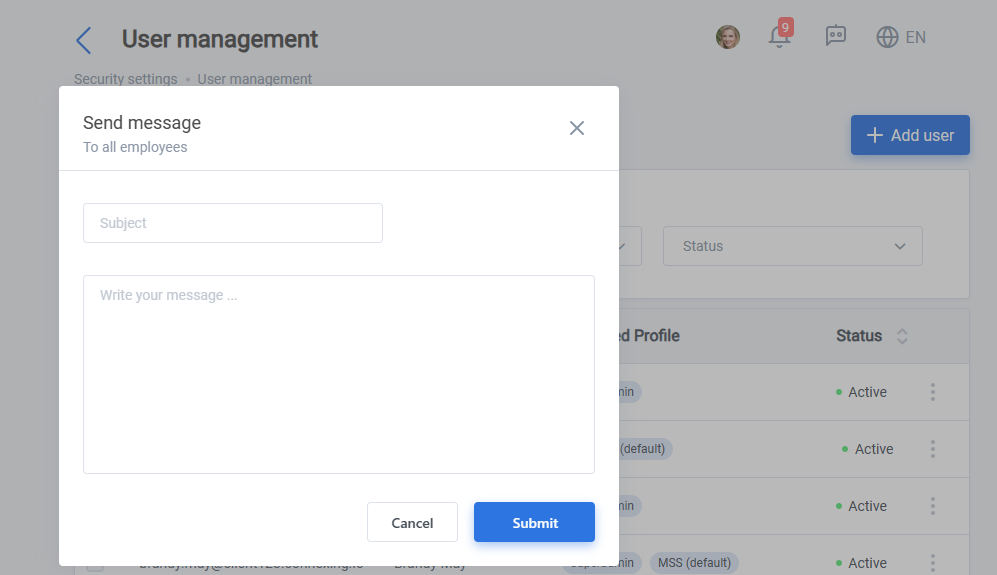
There is also the option to send a message to all the users using “Message to all” button and choosing a subject and message content: